All Categories
Featured
Table of Contents
- – Rv Couch Silverado, CA
- – OCRV Center
- – Rv Sofa Beds Silverado, CA
- – Rv Upholstery Silverado, CA
- – Rv Dinette Booth Silverado, CA
- – Rv Replacement Awnings Silverado, CA
- – Rv Couch Silverado, CA
- – Rv Upholstery Silverado, CA
- – Rv Upholstery Silverado, CA
- – Rv Interior Remodel Silverado, CA
- – Rv Dinette Booth Silverado, CA
- – Rv Dinette Booth Silverado, CA
- – OCRV Center
Rv Couch Silverado, CA
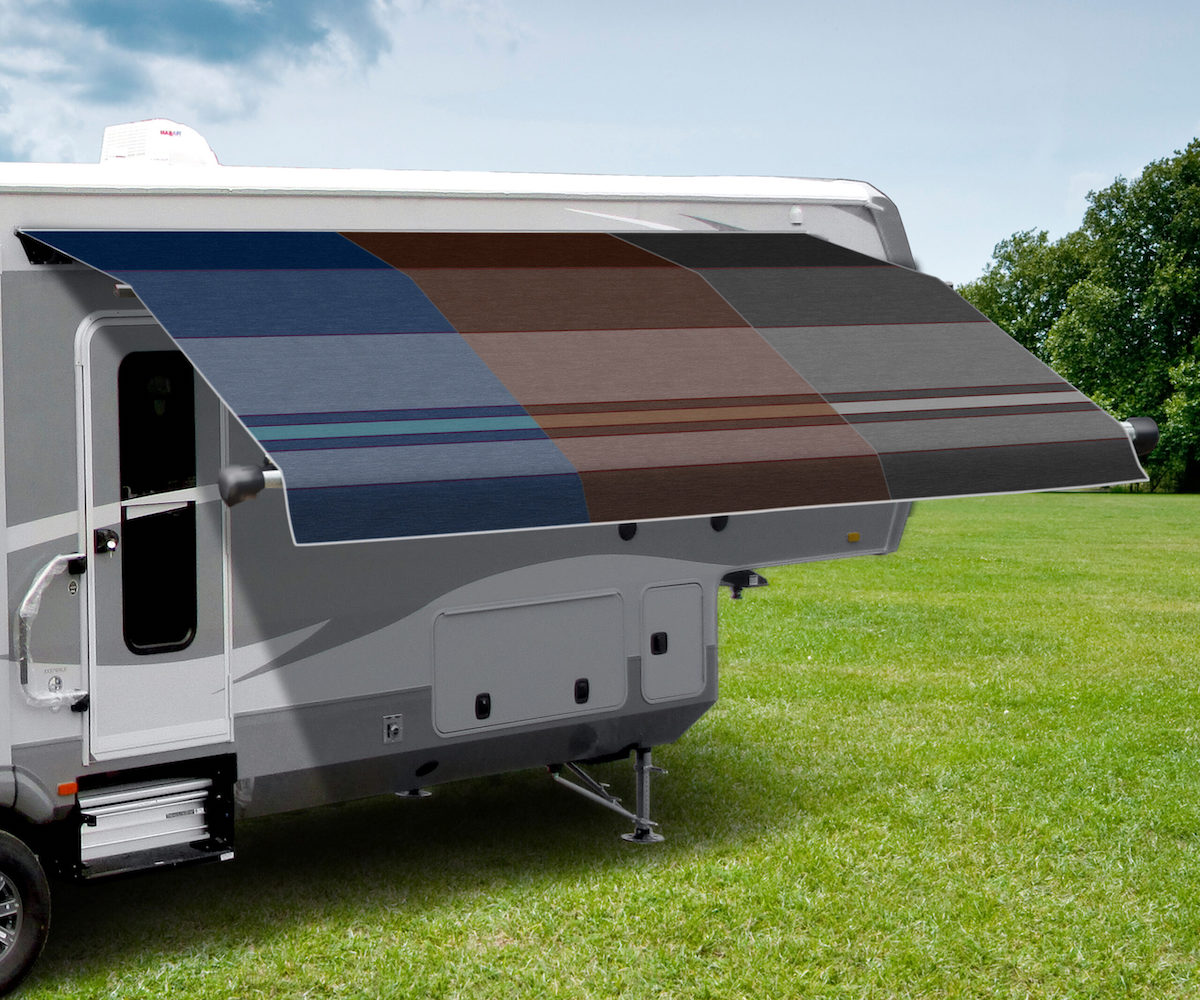
Even though it was below our big patio awning, there were times when having the primary awning prolonged didn't make feeling (in gusty conditions, or when we were away from the recreational vehicle, for instance), yet we still wished to have the home window shaded to assist maintain the gear colder. In this post, we're providing a step-by-step overview (video clip included) to aid you tackle this task on your own with self-confidence.
Initially, you should examine where you intend to put the window awning to be certain there aren't any type of blockages over or along with the window you plan to cover, such as patio area awning arms, vents, etc. Measure the width you prepare the window awning to be and ensure the location is clear for the placing rail, roller, and assistance arms.
Meticulously look at the actions they advise, consisting of measuring/sizing. You may need to measure how far beyond the size of the home window they suggest the awning expands and just how high over the window the placing rail gets installed, and so on. See to it all of the specs will work for your installment.
Rv Sofa Beds Silverado, CA
They often tend to be little broader than the window itself. If, like us, your gear has windows that slide sideways (vs flip-up/flip-out style windows), it can rain in. Extending the home window awning can, certainly, block rainfall from coming in. If it's even a little bit windy, that can conveniently blow rain in from the side.
Ours extends out nicely on each side of the window. As John prolongs our new window awning, you can see that we purchased one that's MUCH broader than any type of factory-installed awning we've seen. We had the area for it, and it left us much better safeguarded from both rain and sun.
We typically see minimally-sized window awnings that do not safeguard along with they can have if they expanded out simply a couple of inches extra on each side. So, if you have room for it, consider going with a broader window awning, like we did. Once you have actually done every one of the above, you can order the appropriate dimension awning(s) for your recreational vehicle's window(s).
Remember that we did this in a location on our gear where no awning was ever before set up previously, not as a substitute project. Several of the actions are the same as entirely replacing a damaged or faulty awning. Note that we finished our window awning setup back in 2014 making use of a Dometic Elite Series awning.
Rv Upholstery Silverado, CA
Measure the new awning rail to confirm that it's the specific length you bought. To figure out the proper setting of the awning rail above the home window structure, gauge the size of the end of the fabric roller tube setting up.
After that, making use of the roller tube's size dimension, use your Sharpie to mark that distance onto the side of the RV over the window structure in 3-4 places along the home window. In our case, we make numerous tiny dots with our felt-tip pen, precisely 3 over the window frame. Step the diameter of the roller tube setting up (left) and after that use that dimension to mark the distance above the window frame where the awning will certainly be set up (right).
Rv Dinette Booth Silverado, CA
Re-confirm the size of your window and mark the facility factor over the window structure. Make your marks the same range over the home window structure that you established in Step 4. In our installation, we noted the external wall surface of the motor home in the exact facility of the home window, specifically 3 above the window frame.
Unfold a few of the butyl/putty tape and use it to the rear of the awning rail, pressing it lightly into place along its entire size. Cut the tape despite completion of the rail and afterwards peel off the support paper off. Meticulously put the lower side of the awning rail along the marks you made over the home window, ensuring to line up the facility mark on the rail with the center mark on the side of the motor home over the window.
The putty tape will hold the imprison location in the meantime up until you install the screws. To prevent splitting the fiberglass or finish as you screw the awning imprison location, you'll intend to pre-drill the holes for the awning rail screws. The complying with tip is one you can utilize moving forward in all sorts of drilling applications.
Wrap the appropriate dimension drill bit (we utilized a 1/16 bit for this function) with several turns of electrical tape, leaving concerning 1/2 of the drill bit exposed. The tape will certainly function as an overview to stop you from drilling much deeper than required into the wall surface of the RV. Covering the drill little bit with a number of turns of electric tape will prevent you from piercing deeper than needed right into the wall of the RV.
Rv Replacement Awnings Silverado, CA
Only pierce until the bit experiences or until the electrical tape overview touches the side of the motor home. Install the center screw and after that examine one last time to ensure that all-time low of the rail runs completely straight along the marks you made over the window frame.
NOTE: Be certain to prevent over-tightening the screws. We utilize a cordless drill to make the task go quicker.
When the awning rail is totally mounted, you'll notice that the pressure of tightening up the screws will press/squeeze a few of the putty tape out along the side of the rail. This is totally regular, as it ensures that the installation is leak-proof. Use your disposable plastic blade or plastic putty blade to delicately cut away the excess putty.
Rv Couch Silverado, CA
Once again, be sure to push on the arm and the end of the roller setting up to ensure that the of the roller tube is also with the center of the awning rail track. When you've verified that you're holding the arm square to the home window and at the correct height, utilize your Con artist to note a small dot on the side of the recreational vehicle through the hole of the foot bracket.
Next, measure the distance between both placing holes in the foot brace. Then make a second mark precisely that distance straight the reduced mark. Currently you can complete the specific very same measuring and noting process on the other side of the window. Hold the arm up to straighten the top of the roller with the center of the rail's track, ensuring the arm is square to the home window; mark the lower hole; mark the upper opening the same distance straight above the very first mark.
Rv Upholstery Silverado, CA
On the left you see us determining the distance between the installing holes in the foot bracket. We after that made a second mark precisely that distance directly above the lower mark on each side of the home window. For our RV's fiberglass walls and the consisted of installing screws, we utilized a 1/8 drill little bit and the very same electrical tape trick we shared earlier.
Make sure to drill gradually, just going as deep as needed to survive the wall surface. For aluminum-sided RVs, you'll be making use of Oscar rivets and a pop rivet weapon instead, piercing the appropriate-sized hole for those initial. Again, be certain to pierce slowly and thoroughly to make sure that you can quit without going any kind of much deeper than required into the outer wall of the RV.
Individually, hold each arm up into position and mount a Phillips head screw via the placing hole on each brace. Use a set of pliers, align, eliminate, and discard the two cotter pins, one at each end of the roller tube assembly. Those remained in location for delivering just and are no more required.
Rv Upholstery Silverado, CA
Utilize your disposable plastic blade to slice away any kind of excess butyl tape that may have pressed out from the sides of the foot brackets. As long as you covered all of the openings with tape before screwing the foot right into location, you ought to be excellent to go.
Draw the strap to totally extend the awning. Put the strap wall mount bracket through the leading loop of the strap (if your band has more than one look) and position the brace versus the side of the Recreational vehicle. Ensure the strap is centered in the roller tube and is aiming right down.
Then mark the second hole utilizing the first mark and the brace as an overview. Once again, drill pilot openings for the 2 screws that will certainly secure the strap hanger brace sideways of the recreational vehicle. Silverado Rv Restoration Companies. You'll be using Phillips head screws for fiberglass Motor homes and Oscar rivets for aluminum RVs, so once again make certain to use the appropriate drill little bit
Once again, use your plastic blade to clean away any kind of excess putty after you've affixed the brace to the side of the motor home. Verify that the awning is centered on the track by rolling it in and out a pair of times. If it's positioned correctly, the material will roll in and out smoothly and flat.
Rv Interior Remodel Silverado, CA
As soon as you have actually validated that the roller and awning setting up is centered, install the consisted of self-drilling screws to hold it in location, one at each end of the track. Come straight in from the leading as you mount the screws securely versus each end of the awning.
A lot of on the internet merchants sell replacement parts, but not whole home window awnings, so calling a recreational vehicle dealership near you may be your best choice, also. If you already have a home window awning and the equipment is still in excellent shape, you can replace just the old worn-out fabric - Silverado Rv Restoration Companies. We've highly suggested Tough Top Awnings for many years as the best awning and slide-topper substitute textile we've ever before seen
Blunders throughout setup can bring about leakages, unpredictable assistance, and even damages to your RV. This extensive overview details each step for efficiently setting up a motor home awning, from preparation to final touches. By adhering to these instructions carefully, you can take pleasure in the benefits of a recreational vehicle awning without the anxiety of common installation errors.
Rv Dinette Booth Silverado, CA
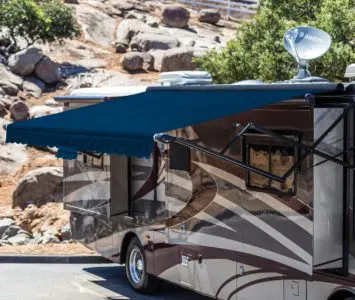
Retracting Awnings: These awnings roll up when not in usage, shielding the textile from weather damage and lowering damage. They supply flexibility for varying climate condition. Repaired Awnings: Permanently placed and offer constant shade. While they offer less versatility, they are excellent for those that often park their recreational vehicle in the exact same area.
Consider the area you want to color and match the awning's measurements as necessary. Polymer awnings offer breathability, which reduces warm buildup under the awning, perfect for warmer environments (Silverado Rv Restoration Companies).
Rv Dinette Booth Silverado, CA
Procedure the Mounting Room: Carefully measure the width where your awning will be set up. Check Awning Directions: Each awning model has special mounting specifications.
Be generous with sealer in areas prone to water direct exposure. Area brackets on both ends of the awning rail and along the center (if needed by the manufacturer). Protected braces making use of screws, ensuring they are tightened up strongly to support the structure. The roller tube is the backbone of your awning system, housing the material and permitting smooth extension and retraction.
Replacement Windows For Campers Silverado, CARv Chairs Silverado, CA
Rv Sofa Sleeper Silverado, CA
Replacement Windows For Campers Silverado, CA
Rv Dinette Booth Silverado, CA
Rv Interior Furniture Silverado, CA
Rv Restoration Companies Silverado, CA
Rv Replacement Furniture Silverado, CA
Rv Sofa Beds Silverado, CA
Rv Dining Table Silverado, CA
Replace Rv Flooring Silverado, CA
Rv Refrigerator Replacement Silverado, CA
Replacement Rv Windows Silverado, CA
Rv Interior Remodel Silverado, CA
Rv Interior Remodel Silverado, CA
Rv Microwave Replacement Silverado, CA
Replacement Rv Windows Silverado, CA
Awning Installation Silverado, CA
Replacement Windows For Campers Silverado, CA
Rv Floor Replacement Silverado, CA
Rv Dinette Booth Silverado, CA
Awnings For Rv Silverado, CA
Rv Microwave Replacement Silverado, CA
Remodeling Rv Silverado, CA
Rv Sofas Silverado, CA
Replacement Rv Refrigerator Silverado, CA
Rv Couch Silverado, CA
Rv Sofa Sleeper Silverado, CA
Awnings For Trailers Silverado, CA
Rv Dining Table Silverado, CA
Awnings For Rv Silverado, CA
Replacement Windows For Campers Silverado, CA
Replacement Rv Windows Silverado, CA
Replacement Windows For Rv Silverado, CA
Rv Interior Furniture Silverado, CA
Awnings For Trailers Silverado, CA
Rv Sofas Silverado, CA
Rv Couch Bed Silverado, CA
Rv Replacement Furniture Silverado, CA
Rv Restoration Companies Silverado, CA
Rv Couch Silverado, CA
Replacement Windows For Campers Silverado, CA
Rv Couch Silverado, CA
Rv Interior Remodel Silverado, CA
Rv Replacement Awnings Silverado, CA
Rv Refrigerator Replacement Silverado, CA
Awnings For Trailers Silverado, CA
Rv Couch Bed Silverado, CA
Awnings For Rv Silverado, CA
Awnings For Rv Silverado, CA
Rv Dinette Table Silverado, CA
Rv Floor Replacement Silverado, CA
Rv Chairs Silverado, CA
Awnings For Trailers Silverado, CA
Rv Restoration Companies Silverado, CA
Rv Upholstery Silverado, CA
Replacement Windows For Campers Silverado, CA
Rv Dinette Booth Silverado, CA
Rv Dinette Booth Silverado, CA
Rv Couch Bed Silverado, CA
Rv Interior Remodel Silverado, CA
Rv Couch Silverado, CA
Rv Restoration Companies Silverado, CA
Rv Microwave Replacement Silverado, CA
Rv Sofas Silverado, CA
Rv Replacement Awnings Silverado, CA
Remodeling Rv Silverado, CA
Rv Carpet Installation Silverado, CA
Rv Dining Table Silverado, CA
Rv Floor Replacement Silverado, CA
Replacement Rv Windows Silverado, CA
Rv Couch Silverado, CA
Rv Carpet Installation Silverado, CA
Replacement Rv Refrigerator Silverado, CA
Rv Couch Bed Silverado, CA
Rv Carpet Replacement Silverado, CA
Rv Sofa Beds Silverado, CA
Motorhome Carpets Silverado, CA
In Seo Silverado, CA
Finding A Good Local Top Seo Company Silverado, CA
Rv Restoration Companies Silverado, CA
OCRV Center
Table of Contents
- – Rv Couch Silverado, CA
- – OCRV Center
- – Rv Sofa Beds Silverado, CA
- – Rv Upholstery Silverado, CA
- – Rv Dinette Booth Silverado, CA
- – Rv Replacement Awnings Silverado, CA
- – Rv Couch Silverado, CA
- – Rv Upholstery Silverado, CA
- – Rv Upholstery Silverado, CA
- – Rv Interior Remodel Silverado, CA
- – Rv Dinette Booth Silverado, CA
- – Rv Dinette Booth Silverado, CA
- – OCRV Center
Latest Posts
Vision Dental Insurance For Seniors Orange County
Individual Health Insurance Plans Aliso Viejo
Beverly Hills Hood Filter Cleaning
More
Latest Posts
Vision Dental Insurance For Seniors Orange County
Individual Health Insurance Plans Aliso Viejo
Beverly Hills Hood Filter Cleaning