All Categories
Featured
Table of Contents
- – Motorhome Roof Replacement Anaheim, CA
- – OCRV Center
- – Rv Rubber Roof Replacement Cost Anaheim, CA
- – Motorhome Roof Replacement Anaheim, CA
- – Rv Slide Out Roof Repair Anaheim, CA
- – Rv Rubber Roof Replacement Anaheim, CA
- – Rv Roof Repair Fiberglass Anaheim, CA
- – Resealing Rv Roof Anaheim, CA
- – Rv Trailer Roof Repair Anaheim, CA
- – Rv Roof Leak Repair Near Me Anaheim, CA
- – Rubber Roof Installation Anaheim, CA
- – Rv Slide Out Roof Repair Anaheim, CA
- – Resealing Rv Roof Anaheim, CA
- – Class C Rv Roof Repair Anaheim, CA
- – Rv Trailer Rubber Roof Repair Anaheim, CA
- – OCRV Center
Motorhome Roof Replacement Anaheim, CA
As you can see from the dramatic outcome of a poorly kept seam in the video clip ingrained over, any joints on Motor homes should be frequently inspected for the integrity of the sealer. All you need other than a putty blade to help with the elimination of the old Dicor is a tube of Dicor and a caulk weapon.
Know plainly what is and is not covered by your motor home insurance plan, and ask how to get the coverage you want, depending on its price. Where RV roof covering leakages are worried, it might depend on the way the damage took place. For instance, insurance provider reject claims on the damages that takes place from leakages that are taken into consideration to be maintenance-related.
Dicor sealant that is cracked like this from exposure to the sun and various other weather needs to be replaced. It's an easy and worthwhile work. A quick check of the sealer around vents, fans, photovoltaic panels, a/c, and antennas every 1 month approximately maintains our recreational vehicle roofing in fantastic condition, preventing possibly costly leakages.
Rv Rubber Roof Replacement Cost Anaheim, CA
Once more we urge you to speak to your insurance policy representative regarding your insurance coverage. RV roofing system leaks can be actual mischief-makers. Discovering how to stop them to begin with is your greatest protection against possibly considerable damages to your RV, and also to your health. Join our e-newsletter to find out about all things RV-related.
Whether this is your very first time on the roadway or you're a seasoned expert, we would certainly love for you to geek out with us!.
Motorhome Roof Replacement Anaheim, CA
Having a RV supplies freedom and experience, however it also comes with a reasonable share of maintenance obligations. One of one of the most crucial tasks for motor home proprietors is keeping the honesty of the roof. A dripping motor home roofing can cause considerable indoor damage, mold and mildew growth, and also architectural issues if left neglected.
If not resolved, water breach can cause: Delamination of walls and ceiling By carrying out regular examinations and understanding how to deal with recreational vehicle roof repair service, you can expand the life of your vehicle and avoid costly damages. Before you can fix a leak, you require to find it. This can be more difficult than it sounds, as water commonly travels much from the entrance factor prior to showing noticeable indicators.
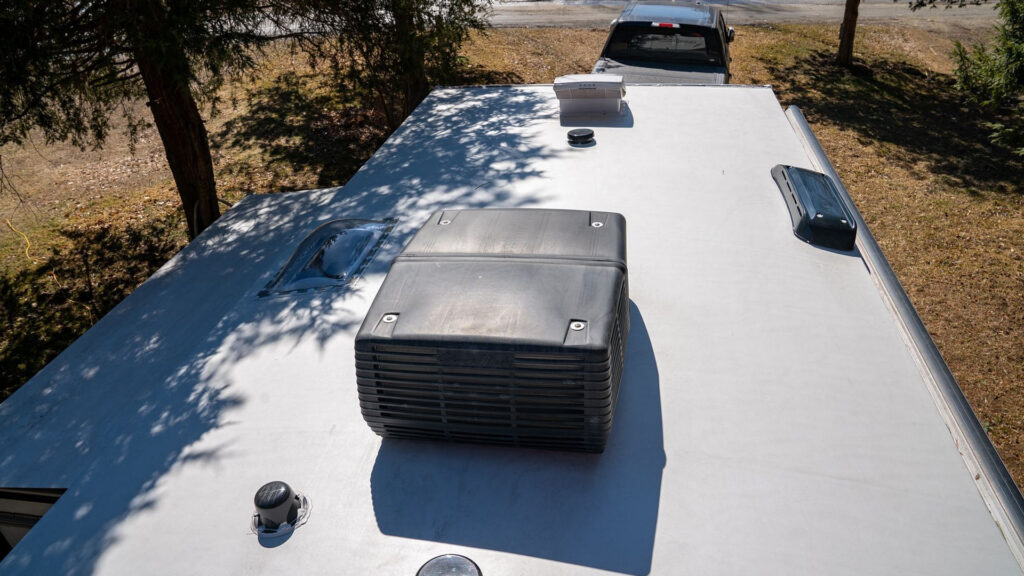
Seek cracks, soft areas, punctures, or tatty caulking around joints, vents, skylights, and antennas. Check out the edges of the roof where it satisfies the walls. These locations are particularly susceptible to leakages. Inside the motor home, search for discoloration or drooping in the ceiling. Check around roof-mounted devices for signs of water.
Take into consideration using a liquid roof layer: Cover up off locations not to be covered. Mix and put the finishing evenly throughout the roof covering.
Rv Slide Out Roof Repair Anaheim, CA
Use a flashlight to inspect the indoor ceiling. Debris accumulation can hold moisture and weaken materials (Anaheim Replace Rv Roof). Tidy every 3-6 months, depending upon use and storage space. Use a breathable motor home cover or Outrig indoor storage. Stay clear of car parking under trees where limbs and sap can harm the roof. While numerous RV roofing system fixings can be DIY jobs, some circumstances need professional assistance: Structural damages or significant roofing system sagging Large, surprise leaks that are tough to trace Complete membrane layer replacement Insurance-related repair work Discovering just how to execute a motor home roof covering repair encourages you to protect your investment, conserve cash, and avoid mid-trip catastrophes.
If you do not check, reseal, and fix your recreational vehicle roof frequently, you will certainly finish up with some attractive terrible water damage. This is something that will rapidly reduce the worth of your RV and might also render it pointless. The good news is, caring for your RV roof covering is something you can most likely do all on your own.
After regarding ten years, it will also be essential to reseal the entire roof. To do this, you'll need to climb up onto the roofing, but be extremely mindful when you do.
Rv Rubber Roof Replacement Anaheim, CA
Next, you'll desire to cleanse your roof completely, so as to eliminate any type of dust bits. You can make use of a long dealt with brush for this, however never ever make use of a cleaner that consists of oil solvents or citrus ingredients on your rubber or plastic roofing system. These sorts of cleaners will certainly create permanent damage to the surface area.
While you're cleansing, remove any type of debris or old roofing system material, yet be careful while you do this as you could conveniently lengthen a tear, or perhaps punch a hole with the roofing system. You need to then dry out the roofing as best as you can. Keep In Mind: Rubber motor home roofings can be very slippery when damp.
After the roof covering is clean, you are going to want to evaluate the joints for holes, fractures or peeling off, so you can reseal anywhere required. In addition to that, you'll desire to challenge resealing all seams as soon as a year whether they show signs of wear.
Rv Roof Repair Fiberglass Anaheim, CA
When it concerns choosing the very best RV roofing system sealer, you'll wish to take into consideration whether you are fixing a tear, resealing a joint, or securing the whole roofing. The kind of roofing is likewise vital to bear in mind, as RV roofing systems can be made from either EPDM (Ethylene Propylene Diene Monomer) and TPO (Thermal Polyolefin) and you require the item you use to be compatible with your roofing system kind.
Dicor Self-Leveling Lap Sealer is a good option for going over old roof seals. It can be made use of for place sealing or to reseal every seam on the recreational vehicle roof covering. Just clean up the area well and use with a caulk weapon. The stuff will certainly level itself out, so don't fret about that component.
Resealing Rv Roof Anaheim, CA
Similar to the EPDM system detailed above, this coating item will cover your TPO roofing and assist it last one more 10 years. Before EPDM and TPO, steel was the product of choice for RV roofing systems.
The aforementioned EternaBond is still king when it comes to repairing small damages on a steel roofing system. RV metal roofings do need to be entirely resealed from time to time.
Dicor Self-Leveling Lap Sealant works well for this task. You'll need to eliminate the existing roof covering.
Remove the vent followers, skylights, and air conditioner unit. Peel the present layer of rubber back till you see the plywood structure underneath. Check plywood for rot, bowing, mold, or splintering. Change harmed items. As soon as the plywood prepares, it's best to cleanse the plywood with something like mineral spirits to eliminate any type of sort of debris.
Rv Trailer Roof Repair Anaheim, CA
Do this in small portions all along the roof covering, reducing holes in the rubber roof for any kind of feature that will certainly go back into the roofing system. Change your roofing's followers, skylights, and AC system. Seal each seam with the lap sealer we mentioned previously. You'll additionally desire to apply lap sealer to the edges of the roof covering.
In this blog post, we intend to share with you just how to DIY recreational vehicle roofing fixing. Living in a motor home has remarkable minutes, but things also go incorrect. Knowing how to DIY a great deal of the important things that can break or ruin will certainly save you not only a great deal of cash on RV fixings yet might likewise save you a great deal of potential time in the store! This message may have associate web links.
Rv Roof Leak Repair Near Me Anaheim, CA
I might get a small payment when you make an acquisition using my web link. Sometimes, though, we find ourselves in unplanned situations. This is exactly how we finished up with a couple of tiny splits on the roof covering of our RV.
We assumed we were clear of the branches, but we finished up capturing a few of them on the much left side of the roofing system. There were an overall of 4-5 little openings in the side of the roof. We really did not check the roofing system since we really did not assume we hit anything.
Among the tears in our motor home roofing system A few weeks later on, we withstood an extreme thunderstorm and a great deal of rain. Throughout the tornado, we discovered that we had a small amount of water leaking with among the light fixtures in the restroom. The good news is, we did not finish up with any type of long-term water damage.
Rubber Roof Installation Anaheim, CA
He patched it as best he could with durable gorilla tape and afterwards got the products required to do a motor home roof covering repair work. The EPDM rubber roof covering product that most Motor homes come with is generally pretty hard as much as roofing products go. Rubber roofing systems last for many years, yet they do tear if captured hard sufficient.
In our case, this implied eliminating the gorilla tape that we had actually utilized as a short-term solution while we waited for the products we purchased to get here. You'll intend to cleanse the area around the tear that you will certainly be patching well. This allows the spot to correctly stick and will certainly stop future leaks.
To clean up the roofing, make use of rubbing alcohol and either a cloth or paper towels., which is a RV roofing repair tape.
You will certainly intend to measure out just how much you require and cut a piece accordingly. Get rid of the support and apply carefully over the tear in the roof. Once it has touched the roof covering, it adheres rather promptly, so you'll wish to make certain and placement it right the initial time.
Rv Slide Out Roof Repair Anaheim, CA
Press firmly and remain to massage it and ravel the spot for a number of minutes. Utilizing a caulk gun, layer the entire patch with Dicor 501LSW-1 Epdm Self-Leveling Lap Sealer. This rubber sealant creates a secure secondary seal on your rubber roofing and guarantees that the leak is properly sealed.
There are a great deal of Dicor RV roof covering fixing products that you can acquire including roof coatings, roofing sealant, and extra for the surface of your roof covering. Applying the Dicor lap sealer Start on the brink and work your means around the entire spot, filling out the center as you go.
Clean any excess off and don't enable it to run down also much. This is a self-leveling sealer so you need to finish up with a fairly level patch (Anaheim Replace Rv Roof). According to the producer, it will be waterproof in 4 hours, 80% healed in 2 days, and 100% healed in thirty day
Resealing Rv Roof Anaheim, CA
To replace a whole RV roofing with substantial damage would certainly result in much even more costly repairs. To avoid RV roofing system problems, examining your roofing on a regular basis during RV maintenance is a great idea.
Your recreational vehicle is a home on wheels, whether for numerous days at once or throughout the year. Like a home, the water supply can leak, such as the fresh water container or the hot water heater. A RV is also more at risk to certain leaks, such as in the roofing system, since it is mobile and has a much more lightweight style than your home.
Your RV is a substantial financial investment. Here are a couple of factors examinations and repair services issue: When you examine your RV routinely, you can capture issues like leaks prior to they create extensive damages to your interior.
Class C Rv Roof Repair Anaheim, CA
Water dripping from the air conditioning device outside the RV is regular throughout procedure. The water must follow a certain course down the networks on the roof covering that lead it down to either the forward or aft edge of the rig. If you see water trickling inside or leaking in another location outside, that might indicate a problem with the system.

Pipes leaks can turn up in the storage space area also. Often, water damages presents apparent indications, yet you might not observe it immediately in various other situations. Below are a few points to keep an eye out for: Mold and mold development Visible water stains or rust Pools or wet places Undesirable scents Flaking paint or aluminum Squeaky, soft or askew wall surfaces or floorings Deformed or misshapen wood closets or trim Condensation on home windows or inside cupboards Water damage or condensation in your recreational vehicle can create different hazardous impacts.
Before you start the process of camper leak repair work, you need to locate the source. Adhere to these actions to recognize the leak's origin factor: Inspect the roof, wall surfaces, ceilings and doors to find any type of locations with worn or broken seals and caulking.
Run water with the faucets and inspect for leaking water at the links. Analyze wastewater and freshwater systems for splits or leaks in the storage tanks, connections and hose pipes.
Rv Trailer Rubber Roof Repair Anaheim, CA
OCRV Center
Address: 23281 La Palma Ave Yorba Linda, CA 92887Phone: (714) 909-1444
Email: art@ocrvcenter.com
OCRV Center
Spray specific locations while another person stands inside the camper to see where water enters. A flashlight illuminates the area for more reliable assessment in confined, dark locations like closets and plumbing components. This device links to hose pipes to look for abnormal stress goes down that might suggest a leak.
Rv Solar Panel Installation Anaheim, CABest Rv Repair Near Me Anaheim, CA
Rv Generator Repair Anaheim, CA
Rv Service Repair Near Me Anaheim, CA
Rv Repair And Service Near Me Anaheim, CA
Rv Ceiling Repair Anaheim, CA
Motorhome Repair Near Me Anaheim, CA
Rv Service Repair Near Me Anaheim, CA
Rv Repairs Near Me Anaheim, CA
Rv Plumbing Repair Near Me Anaheim, CA
Rv Repair And Service Near Me Anaheim, CA
Motorhome Repair Shops Anaheim, CA
Rv Mechanics Near Me Anaheim, CA
Motorhome Refrigerator Repair Anaheim, CA
Rv Plumbing Repair Near Me Anaheim, CA
Motorhome Awning Repair Anaheim, CA
Motorhome Repair Service Anaheim, CA
Rv Repair In My Area Anaheim, CA
Rv Repair Centers Near Me Anaheim, CA
Rv Repair In My Area Anaheim, CA
Rv Mechanics Near Me Anaheim, CA
Rv Repair And Service Near Me Anaheim, CA
Motorhome Awning Repair Anaheim, CA
Camper Ac Repair Near Me Anaheim, CA
Rv Mechanics Near Me Anaheim, CA
Camper Ac Repair Near Me Anaheim, CA
Motorhome Awning Repair Anaheim, CA
Rv Ceiling Repair Anaheim, CA
Full Service Rv Repair Near Me Anaheim, CA
Motorhome Repair Shops Anaheim, CA
Rv Solar Panel Installation Anaheim, CA
Motorhome Generator Repair Near Me Anaheim, CA
Rv Floor Repair Near Me Anaheim, CA
Rv Solar Panel Installation Anaheim, CA
Rv Mechanics Near Me Anaheim, CA
Rv Plumbing Repair Near Me Anaheim, CA
Motorhome Repair Near Me Anaheim, CA
Best Rv Repair Near Me Anaheim, CA
Rv Delamination Repair Near Me Anaheim, CA
Rv Service And Repair Near Me Anaheim, CA
Motorhome Service And Repair Near Me Anaheim, CA
Full Service Rv Repair Near Me Anaheim, CA
Motorhome Repair Service Anaheim, CA
Rv Plumbing Repair Near Me Anaheim, CA
Rv Ceiling Repair Anaheim, CA
Motorhome Awning Repair Anaheim, CA
Rv Repair In My Area Anaheim, CA
Motorhome Repair Shops Anaheim, CA
Motorhome Repair Shops Anaheim, CA
Rv Repair Services Near Me Anaheim, CA
Rv Delamination Repair Near Me Anaheim, CA
Motorhome Repair Shop Anaheim, CA
Motorhome Repair Shops Anaheim, CA
Motorhome Refrigerator Repair Anaheim, CA
Motorhome Refrigerator Repair Anaheim, CA
Motorhome Refrigerator Repair Anaheim, CA
Rv Solar Installation Anaheim, CA
Rv Repair Service Near Me Anaheim, CA
Rv Floor Repair Near Me Anaheim, CA
Rv Plumbing Repair Near Me Anaheim, CA
Full Service Rv Repair Near Me Anaheim, CA
Rv Solar Installation Anaheim, CA
Rv Delamination Repair Near Me Anaheim, CA
Rv Repairs Near Me Anaheim, CA
Motorhome Repair Near Me Anaheim, CA
Motorhome Generator Repair Near Me Anaheim, CA
Rv Repair Shops Near My Location Anaheim, CA
Motorhome Repair Shop Anaheim, CA
Rv Repair In My Area Anaheim, CA
Rv Repair And Service Near Me Anaheim, CA
Rv Repair Shops Near My Location Anaheim, CA
Motorhome Refrigerator Repair Anaheim, CA
Motorhome Awning Repair Anaheim, CA
Rv Repairs Near Me Anaheim, CA
Rv Service Repair Near Me Anaheim, CA
Rv Repairs Near Me Anaheim, CA
Motorhome Repair Service Anaheim, CA
Rv Solar Installation Anaheim, CA
Near Me Seo Services Anaheim, CA
Finding A Local Seo For Small Business Anaheim, CA
OCRV Center
Table of Contents
- – Motorhome Roof Replacement Anaheim, CA
- – OCRV Center
- – Rv Rubber Roof Replacement Cost Anaheim, CA
- – Motorhome Roof Replacement Anaheim, CA
- – Rv Slide Out Roof Repair Anaheim, CA
- – Rv Rubber Roof Replacement Anaheim, CA
- – Rv Roof Repair Fiberglass Anaheim, CA
- – Resealing Rv Roof Anaheim, CA
- – Rv Trailer Roof Repair Anaheim, CA
- – Rv Roof Leak Repair Near Me Anaheim, CA
- – Rubber Roof Installation Anaheim, CA
- – Rv Slide Out Roof Repair Anaheim, CA
- – Resealing Rv Roof Anaheim, CA
- – Class C Rv Roof Repair Anaheim, CA
- – Rv Trailer Rubber Roof Repair Anaheim, CA
- – OCRV Center
Latest Posts
Travel Trailer Floor Repair Placentia
Custom Rv Paint Jobs La Habra
Mira Loma Web Design Agency
More
Latest Posts
Travel Trailer Floor Repair Placentia
Custom Rv Paint Jobs La Habra
Mira Loma Web Design Agency