All Categories
Featured
Table of Contents
- – Rubber Roof For Camper Rowland Heights, CA
- – OCRV Center
- – Rubber Roofing For Rv Rowland Heights, CA
- – Rubber Roofing For Rv Rowland Heights, CA
- – Resealing Rv Roof Rowland Heights, CA
- – Rv Fiberglass Roof Repair Rowland Heights, CA
- – Rv Roof Leak Repair Rowland Heights, CA
- – Best Rv Roof Repair Rowland Heights, CA
- – Rv Rubber Roof Maintenance Rowland Heights, CA
- – Rv Roof Leak Repair Rowland Heights, CA
- – Rubber Roof For Camper Rowland Heights, CA
- – Class C Rv Roof Repair Rowland Heights, CA
- – Rv Rubber Roof Repair Rowland Heights, CA
- – Rubber Roofing For Rv Rowland Heights, CA
- – Rv Roof Leak Repair Near Me Rowland Heights, CA
- – OCRV Center
Rubber Roof For Camper Rowland Heights, CA
This window seal will certainly let water enter Pay special attention to seams on the leading and sides. They are a lot more susceptible to put on and leak since they obtain most of water runoff from the roof.:. Rusty screws that protect wall panels, lights, and various other openings are an indication that wetness lags the outer wall.
One areas commonly missed out on is following to the awning. Right here's a Moving within, water damage around windows can trigger swelling, staining or possibly mold and mildew in the surrounding wall surface paneling.

Water dripping from the top of a window often diminishes the side of the window into the paneling around the reduced corners. Once you've determined what areas need to be resealed, comply with these actions to obtain a specialist outcome. Use the pointy and level end of a scrape to get rid of all existing sealant.
Rubber Roofing For Rv Rowland Heights, CA
Mineral spirits can aid relax residual sealer after the first scrape. Put some on a cloth wipe the around the location giving it a couple of mins to do its magic prior to proceeding. Utilize a scraper to eliminate old sealant If you're worried about scraping your paint task, then I would certainly suggest making use of a plastic scrape.
An energy blade works well for this. This step is essential to getting a correct seal. Spray on some window cleaner and use a clean rag or shop towel to cleanse the location. The home window cleaner will cleanse it up perfectly and evaporate quicker. Clean surface area extremely well before using new sealer Dry the entire location with a towel prior to relocating on.
Tape around home window structure leaving 1/8 boundary for sealant What kind of sealer to utilize? Everybody has their favorite sealer for each kind of surface and application.
I prefer the clear 100% silicone sealant from my neighborhood shop because it works wonderful and can be found in a capture tube. I prefer a clear silicon in a press tube because it's simpler to apply in little locations works good too and is a bit extra costly. I do maintain a couple of tubes of ProFlex useful but primarily utilize it in various other areas.
Rubber Roofing For Rv Rowland Heights, CA
Maintaining your recreational vehicle covered is the very best way to shield it from rainfall, snow, leaves, pollen along with the sunlight. A protected auto parking place is optimal (I sure dream I had one), yet using a recreational vehicle cover is the following best thing. I used a Motor home cover to secure our Class C for several winters.

Locate one that has shields from rainfall along with sun. I have actually found out that covers with thicker material last longer. Handing a huge motor home cover can be truly difficult. Here are some practical ideas to make taking care of a big cover much easier. Washing your recreational vehicle consistently helps avoid moss and mold from creating in window splits.
Resealing Rv Roof Rowland Heights, CA
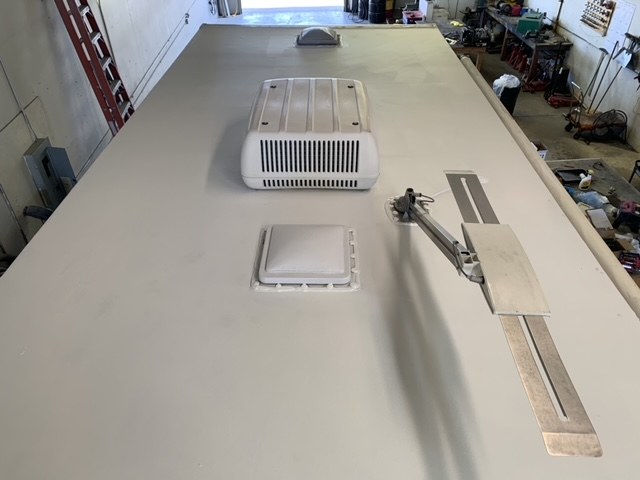
The seams on your Motor home roofing are the most subjected to weather. Adding an added layer of protection on top of any type of existing lap sealer creates an added layer of security.
Normal assessments and preventative maintenance is the finest way to prevent water damage in RVs. After acquiring our older class A motorhome, I spent a couple weeks resealing the whole Recreational vehicle.
I wish this assists you out rather than simply giving you more job to do. Here are a couple associated write-ups that may interest you also.
Rv Fiberglass Roof Repair Rowland Heights, CA
I am taking my RV out of storage and strategy to inspect the seams and sealers on the RV roofing system for any damage (Rubber Roofing For Campers Rowland Heights). Can you tell me what items and approaches work best for re-caulking your recreational vehicle roof covering and how commonly the maintenance should be done? That's a great concern and on a regular basis I see guidance on this subject that is totally wrong
When you check the seams and sealants on your motor home roofing try to find split or dried out sealers that could be separating and enabling water to get penetrate the surface area of the roof covering. If throughout your inspections you recognize any possible leaks in the old sealant it will require to be resealed.
One crucial action is to see if the water has actually currently damaged the roofing system's surface area around the area where it has penetrated the sealant. You can go inside the motor home and really feel around the area for soft places or look for indications of water staining. If the roof covering framework is damaged it will call for repairs much more substantial than we are going over below.
Rv Roof Leak Repair Rowland Heights, CA
If I identify any kind of fractured or divided sealant during an inspection I get rid of any kind of old sealer that hangs around the location I am resealing. To do this I use a plastic squeegee similar to what is utilized when you do body job on an automobile. They can be acquired at any type of vehicle components shop.
When the loosened broken or dried out sealant is removed from the suspicious location I cleanse it with denatured alcohol on a dustcloth and make use of the right Dicor sealer or other suitable sealant with a caulking weapon to reseal the location. If the old sealant is fractured, yet not loosened or separating from the surface it is not required to eliminate the old sealer.
That's all there is to it. If you read a short article about resealing your motor home roof covering and it claims to obtain up on the roof covering with some silicone sealer to reseal a rubber roofing the writer does not understand what they are chatting around. Comply with the evaluation and upkeep intervals in your RV owner's guidebook and reseal any potential damages with a sealer suitable with yor RV roof material and your recreational vehicle roofing will certainly last for many hassle-free years.
Best Rv Roof Repair Rowland Heights, CA
You must likewise evaluate and reseal every one of the other seams and sealants on the exterior of your motor home at routine intervals. Seek advice from the RV proprietor's handbook or your recreational vehicle dealership for sealants compatible with the surface area you are attempting to repair. For more details on RV roofing system care and maintenance enjoy the video clips published listed below.
93Cobra2771 wrote: If done properly, the existing caulk is eliminated, and brand-new dicor self leveling caulk is applied. Many makers claim to do this on an annual basis. You can likewise apply a brand-new layer over an existing layer, yet it is normally recommended to only do it once like that.
It will differ according to how hefty you lay it on, and just how several things you have stuck with your roofing (vents, etc). I directly went with eternabond tape over all my seams, so I never have to stress concerning the sealing on my roofing system once more.
Rv Rubber Roof Maintenance Rowland Heights, CA
Strategy on a pair of excellent weekends to use it correctly, yet it is so worth it in the long run. I agree with all the points made by cobra, especailly the component concerning eliminating the old sealant and utilizing Eternabond for an one time permanent reseal that need to outlive the life of the roofing system.
Locating a leak in your RV is a cause for worry. When you have actually determined that the roofing is the perpetrator of unwanted wetness, you'll require to begin the RV roof resealing procedure. You'll intend to get this done as swiftly as possible, After all, the longer your RV rests with an unaddressed opening in the roof, the a lot more most likely it is that your rig will receive damages, which can endanger your investment.
Rv Roof Leak Repair Rowland Heights, CA
Search every square inch of that surface area, from the roof devices to the sides where the roof fulfills the recreational vehicle wall surface. After the main scrub-down, deal with the location with rubbing alcohol to get rid of any kind of stubborn residue. The last swab with mineral spirits makes sure an excellent surface. The objective right here is to guarantee the sealer will stick. Rubber Roofing For Campers Rowland Heights.
With a putty blade in hand, peel and scrape away the remnants. Once you have actually removed all of the old sealants, it's time to set a clean, solid foundation for the new. As soon as your roof covering is prepared, the next step is to choose the right sealer. Unfortunately, there is no one-size-fits-all solution.
It can be hard to select between tape and liquid sealers. The goal is to remain positive and make sure your RV continues to be a secure and dry area.
Rubber Roof For Camper Rowland Heights, CA
A significant reason a motor home starts to leakage is incorrect storage space and maintenance. Since your recreational vehicle is as excellent as brand-new, you'll intend to locate the best spot to store it. consists of covering the roof covering. If you need an enclosed or covered motor home storage place near you, provide Next-door neighbor a shot.
Reseal RV roof covering joints making use of a. Apply this with a caulk gun and allow it to cure to produce a water tight bond. Before using a new sealer to your Motor home roofing, you must initially remove the old sealant.
There are specific locations that are a lot more susceptible to having troubles than others. The whole roofing gets the burden of the hazardous UV rays that can develop breaking. Additionally, the edges where the wall surfaces fulfill can gradually separate developing issue locations. After that, you have the regular spots around the windows, doors, and flanges.
That is why it is vital you examine these areas regularly and reseal them when essential. The lure is to use silicone because it is made use of throughout your standard home. Silicone may not be your best wager. Silicone battles to stick to previously made use of silicone making it annoying to repair in the future.
Class C Rv Roof Repair Rowland Heights, CA
And that isn't ideal for something that relocates down the road at 60+ miles per hour. Rather of silicone you will desire to make use of something made for RVs and its certain application.
Dicor makes two different types that can cover long cracks or reseal corners. However do not utilize these tapes as a method to avoid replacing your roofing. While checking your roofing, you'll wish to take your time and not hurry with this procedure. It can take a lengthy time, yet generally a good 30 minute examination and you'll be good to go.
Minor splits are normaldue to sunlight exposureso do not worry, yet do not overlook them either. There might be some major damages too. If you do locate serious cracks, you will need to eliminate any kind of debris and sealer that was previously utilized. To make it much easier, you could attempt making use of a heat weapon.
Rv Rubber Roof Repair Rowland Heights, CA
However please take care not to damage your RV's outside paint. Before applying the new sealer, tidy the area with acetone to eliminate all deposit, oils, dirt, and particles, guaranteeing a clear base for the product to abide by. This assists ensure a lengthy long-term sealant is taking place. If you intend to make it look excellent, you can achieve this with a little bit of perseverance and a lot of tape.
After that, apply a bead of sealant utilizing a caulk weapon and smooth the bead with your finger or a caulk tool. After applying and smoothing the grain of sealer, eliminate the painter's tape right away, and allow the sealer treatment for a minimum of 24-hour. By adhering to these actions, you can reseal your motor home outside properly, making sure maximum defense against water damages.
You can find out more concerning that below.
Rubber Roofing For Rv Rowland Heights, CA
If you are unsure which of the two membranes is utilized on your motor home, you can get in touch with the maker or the supplier, or you can examine the membrane itself. TPO is the exact same color on both sides (generally white or beige), and typically has a fleece support on one side.
It's the right selection to secure seams around skylights, vents, and various other devices mounted flat on the roof. On the other hand, if you are re-sealing joints and cracks on vertical surface areas, around windows and other openings, select a non-sag sealant that will certainly remain in location while it dries. Keep in mind: While they have lots of praiseworthy residential properties, commonly readily available silicon sealants aren't the best selection for roof fixings, because they don't adhere firmly to various other sealers, producing a threat of failure where brand-new silicon is applied over old seals.
These make fast fixings of small areas very easy, and can be made use of for little openings or splits in the roofing system membrane. More on these below. Like numerous various other upkeep processes, re-sealing starts with this direction: Make certain the location you are working with is devoid of dirt, loosened caulk, or various other foreign issue.
Rv Roof Leak Repair Near Me Rowland Heights, CA
OCRV Center
Address: 23281 La Palma Ave Yorba Linda, CA 92887Phone: (714) 909-1444
Email: art@ocrvcenter.com
OCRV Center
Make sure you follow the guidelines above, choosing an item that works with your roof kind and the work you will be doing. Cover the areas you want to seal with the recreational vehicle sealant. Watch out for trouble places and see to it they are well-sealed. This new layer of sealer ought to entirely cover any old sealer, and no gaps must be left in between the sealant and the surface it is covering.
Rv Roof Maintenance Rowland Heights, CARv Roof Leak Repair Rowland Heights, CA
Rv Slide Out Roof Repair Rowland Heights, CA
Rv Roof Repair Fiberglass Rowland Heights, CA
Rv Fiberglass Roof Repair Rowland Heights, CA
Motorhome Roof Replacement Rowland Heights, CA
Rv Roof Repair Service Near Me Rowland Heights, CA
Rv Roof Repair Service Near Me Rowland Heights, CA
Replace Rv Roof Rowland Heights, CA
Rv Roof Repair Near Me Rowland Heights, CA
Rubber Roofing For Campers Rowland Heights, CA
Rv Roof Replacement Rowland Heights, CA
Rv Roof Maintenance Rowland Heights, CA
Rv Rubber Roof Replacement Cost Rowland Heights, CA
Rubber Roofing For Rv Rowland Heights, CA
Rv Roof Leak Repair Near Me Rowland Heights, CA
Rv Roof Repair Near Me Rowland Heights, CA
Rv Roof Repair Fiberglass Rowland Heights, CA
Epdm Rv Roof Repair Rowland Heights, CA
Rubber Roof For Rv Rowland Heights, CA
Rv Roof Leak Repair Rowland Heights, CA
Rv Roof Repair Fiberglass Rowland Heights, CA
Replace Rv Roof Rowland Heights, CA
Rv Roof Leak Repair Near Me Rowland Heights, CA
Rv Rubber Roof Maintenance Rowland Heights, CA
Rv Rubber Roof Maintenance Rowland Heights, CA
Rv Rubber Roof Replacement Cost Rowland Heights, CA
Rubber Roof For Rv Rowland Heights, CA
Resealing Rv Roof Rowland Heights, CA
Rv Trailer Roof Repair Rowland Heights, CA
Rv Roof Replacement Rowland Heights, CA
Rubber Roofing For Rv Rowland Heights, CA
Rv Roof Leak Repair Near Me Rowland Heights, CA
Roof Repair For Rv Rowland Heights, CA
Rv Trailer Roof Repair Rowland Heights, CA
Repair Rv Roof Leak Rowland Heights, CA
Rv Roof Maintenance Rowland Heights, CA
Replace Rv Roof Rowland Heights, CA
Rubber Roofing For Rv Rowland Heights, CA
Rv Rubber Roof Repair Rowland Heights, CA
Rv Roof Repair Service Near Me Rowland Heights, CA
Roof Repair For Rv Rowland Heights, CA
Rv Roof Repair Fiberglass Rowland Heights, CA
Resealing Rv Roof Rowland Heights, CA
Class C Rv Roof Repair Rowland Heights, CA
Best Rv Roof Repair Rowland Heights, CA
Resealing Rv Roof Rowland Heights, CA
Epdm Rv Roof Repair Rowland Heights, CA
Rubber Roof For Camper Rowland Heights, CA
Rv Roof Maintenance Rowland Heights, CA
Rv Trailer Roof Repair Rowland Heights, CA
Rv Roof Repair Fiberglass Rowland Heights, CA
Rv Rubber Roof Replacement Cost Rowland Heights, CA
Rv Roof Repair Near Me Rowland Heights, CA
Epdm Rv Roof Repair Rowland Heights, CA
Rv Roof Repair Service Near Me Rowland Heights, CA
Rv Rubber Roof Repair Rowland Heights, CA
Rv Roof Repair Service Near Me Rowland Heights, CA
Rv Roof Repair Near Me Rowland Heights, CA
Rv Roof Repair Near Me Rowland Heights, CA
Rv Roof Repair Service Near Me Rowland Heights, CA
Rubber Roof For Rv Rowland Heights, CA
Rv Rubber Roof Maintenance Rowland Heights, CA
Rv Roof Leak Repair Rowland Heights, CA
Rv Roof Repair Rowland Heights, CA
Rubber Roof For Rv Rowland Heights, CA
Rubber Roofing For Campers Rowland Heights, CA
Repair Rv Roof Rowland Heights, CA
Rv Roof Repair Near Me Rowland Heights, CA
Rubber Roofing For Campers Rowland Heights, CA
Replace Rv Roof Rowland Heights, CA
Rubber Roof For Rv Rowland Heights, CA
Rv Roof Repair Rowland Heights, CA
Rv Roof Repair Near Me Rowland Heights, CA
Rubber Roof For Camper Rowland Heights, CA
Rv Trailer Rubber Roof Repair Rowland Heights, CA
Rv Fiberglass Roof Repair Rowland Heights, CA
Rv Roof Repair Fiberglass Rowland Heights, CA
Local Seo Expert Rowland Heights, CA
Affordable Seo Marketing Agency Rowland Heights, CA
OCRV Center
Table of Contents
- – Rubber Roof For Camper Rowland Heights, CA
- – OCRV Center
- – Rubber Roofing For Rv Rowland Heights, CA
- – Rubber Roofing For Rv Rowland Heights, CA
- – Resealing Rv Roof Rowland Heights, CA
- – Rv Fiberglass Roof Repair Rowland Heights, CA
- – Rv Roof Leak Repair Rowland Heights, CA
- – Best Rv Roof Repair Rowland Heights, CA
- – Rv Rubber Roof Maintenance Rowland Heights, CA
- – Rv Roof Leak Repair Rowland Heights, CA
- – Rubber Roof For Camper Rowland Heights, CA
- – Class C Rv Roof Repair Rowland Heights, CA
- – Rv Rubber Roof Repair Rowland Heights, CA
- – Rubber Roofing For Rv Rowland Heights, CA
- – Rv Roof Leak Repair Near Me Rowland Heights, CA
- – OCRV Center
Latest Posts
Senior Insurance Advisor Placentia
Low Cost Dental Services For Seniors Without Insurance Yorba Linda
San Juan Capistrano Best Dental Insurance Seniors
More
Latest Posts
Senior Insurance Advisor Placentia
Low Cost Dental Services For Seniors Without Insurance Yorba Linda
San Juan Capistrano Best Dental Insurance Seniors