All Categories
Featured
Table of Contents
- – Rv Paint Shop Near Me Villa Park, CA
- – OCRV Center
- – Paint Motorhome Exterior Villa Park, CA
- – Rv Painting Near Me Villa Park, CA
- – Rv Painting Near Me Villa Park, CA
- – Painting Rv Exterior Villa Park, CA
- – Painting An Rv Villa Park, CA
- – Motorhome Custom Paint Villa Park, CA
- – Painting An Rv Villa Park, CA
- – Rv Paint Shop Near Me Villa Park, CA
- – Paint Motorhome Exterior Villa Park, CA
- – Rv Paint And Repair Villa Park, CA
- – Rv Painting Near Me Villa Park, CA
- – Paint Motorhome Exterior Villa Park, CA
- – OCRV Center
Rv Paint Shop Near Me Villa Park, CA
A professional looking paint job needs excellent devices, so this is not a place you wish to cut corners. I took into consideration renting or acquiring a paint sprayer, yet ultimately made a decision to stick to paint rollers and brushes because I'm much more comfy paint in this way. It was an excellent decision because the finish came out just fine the method we did it.
Below are the materials we made use of: Here are the actions you'll require to take to complete your Recreational vehicle exterior paint work. It took us most likely 40 hours of heating decals that weren't cracked with a hair clothes dryer and peeling them off.
(we did our range exhaust air vent!.?.!!). Re-caulk any type of joints that require it. Get your surface area as even as possible. Just the lightest of scuffs, do not take layers off. Vacuum and get rid of the dust very carefully. Tape off any fixtures or cut with painters tape. We really did not need to prime independently due to the fact that the paint we selected was 2-in-1.
Go sluggish and come back to it the next day if you have to. Simply do not move the projector until you're done! One year later, and I'm really delighted with how the paint is holding up.
Paint Motorhome Exterior Villa Park, CA
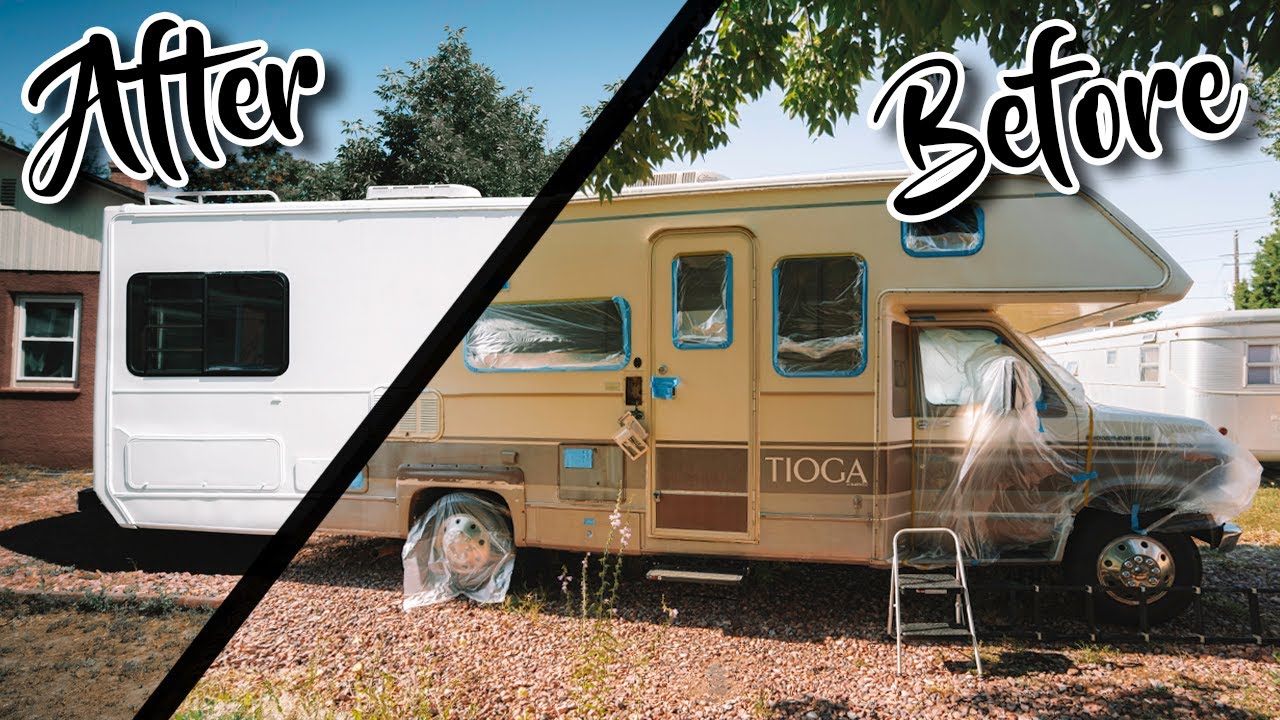
: I truly hurt myself trying to determine whether to repaint our RV exterior, and I am SO grateful that we did. The means we did it might emphasize out the Recreational vehicle exterior paint purists, however I would certainly 100% do this once more.
Associate revenue aids money our family members travel and permits me to keep producing motivating family traveling material for you (Painting Fiberglass Motorhome Villa Park). I so value when you use my links to make acquisitions you would have made anyway. For more motor home restoration, right here are a few other articles you could such as:
Not warm of rattle can? Rattle, rattle. I simply chose the cans up and rattled away. Not excessive to upload concerning that.
Outside RV paint is a whole lot much more complex than it looks. It's not like painting the inside of your travel trailer, 5th wheel, or motorhome, though even that has its own collection of complexities. It's not a matter of picking your preferred shade and slapping right stuff on with a paint roller and a brush.
Rv Painting Near Me Villa Park, CA
If you're bound and determined to remove the professionals and make this a DIY job, this little guide will certainly establish you on the best track. A rig with a fresh layer of exterior recreational vehicle paint is a gorgeous point, particularly if you're liable for it. Outside paints, specifically in Motor home and marine applications, come with a level of clinical sophistication.
When you atomize your paint with an HVLP or airless sprayer, it requires to bond to the surface area at a molecular level. Without appropriate prep work, it can not bond. The results will certainly look amazing, a minimum of up until the first bump goes along and a whole sheet of paint falls off. Prep work is key long before you begged the paint aisle at the hardware store.
It's typically much less concerning the material of the sidewalls and even more concerning the initial paint. Most customers jumping on the DIY paint job bandwagon are boosting an existing visual, not repainting the raw fiberglass or aluminum surface of a RV.
If you are painting the raw surface area, we've obtained you covered there. Your substrate will certainly often be old paint unless you happen to be painting RVs as they come off the production line. There are 2 points you need to recognize that are of miraculous relevance in regards to paint longevity, longevity, and a wonderful visual: surface prep and bonding primer.
Rv Painting Near Me Villa Park, CA
Yes, it will increase the expense of a DIY motor home paint task, but it will certainly likewise conserve you a great deal of money and distress in the near future. The remainder boils down to your overcoat of option. However, which one is the finest, and what do they all suggest? Acrylic is a strong option as an outside motor home paint, particularly if you're repainting the raw surface area of a light weight aluminum motor home.
Since acrylic is a slim paint, it will generally set you back more for the added coatings. Acrylic is normally utilized as a combination for exterior paints, such as acrylic-enamel. Latex is a water-based paint and, for the longest time, oil-based paints have always been the go-to RV exterior paint of choice, or outside anything, for that issue.
Painting Rv Exterior Villa Park, CA
It's difficult to offer this a solid 'yes,' though considering that lasting practicality is still ever before so a little up in the air. Enamel is oil-based and provides the thickest single layer of the bunch. It dries out slowly, but it additionally dries hard, creating a safety shell. Its sluggish drying out time makes paint mistakes fixable.
Quickly among the most versatile finish layers on the list, one-part polyurethane deal with timber, fiberglass, steel, aluminum, and plastics. It provides UV defense and lowers the demand for waxing, many thanks to its shiny surface. It likewise improves wind resistant performance and is a solid waterproofing choice. Surface preparation for polyurethane is an exquisitely in-depth and patient process, however.
If you're going with a super-glossy look, water-based is the wrong choice. Outside motor home paint is all about surface preparation. Without surface area prep, your topcoat may also be made from candy floss. Painting Fiberglass Motorhome Villa Park. Since that's regarding what you'll get out of ita wildly colorful and attractive aesthetic, promptly complied with by wreck, misery, and moving back in with your in-laws.
With appropriate surface area prep, the exterior-grade paint you pick will be exactly how your recreational vehicle occurs to the world. There are a whole lot of tough choices in the above list, and RVers will certainly all be pleased to tell you their own personal preference. Ultimately, it refers obtaining what you pay for.
Painting An Rv Villa Park, CA
That's not to claim the other options are wrong, just much less reliable in terms of durability. Marine quality might seem like it has nothing to do with RVs, however it does, in many methods. Watercrafts and RVs share lots of common features. Some are light weight aluminum, and some are fiberglass. Both need UV defense, waterproofing, rust resistance, flexibility, and a positive visual.
While temperature impacts the healing process of exterior RV paint, there's still a window in which the majority of painting applications are optimal. You're excellent to enter temperatures anywhere between 50F and 85F (Painting Fiberglass Motorhome Villa Park). Prior to you begin, take note of the climate, particularly if you pick an oil-based paint. Because they cure slower, the window for calamity is bigger.
In those cases, find an indoor center, head inland, or wait up until the loss. Stay clear of gusty conditions whenever feasible, particularly if you're going to make use of a paint sprayer.
While bonding guide is often assumed of as the supreme necessity for a solid top coat to adhere, it's not. It's very important, but it's not the end-all-be-all of the process. Not just do you need to sand every square inch of surface area on your recreational vehicle, yet you additionally need to sand your bonding primer.
Motorhome Custom Paint Villa Park, CA
A decal remover can consist of a warm weapon, Goo Gone, or a basic putty scrape. Now, it's time for the bonding primer, which belongs to the surface preparation. You can apply bonding guide with an airless or HVLP sprayer, a roller, or a paintbrush. You do not have to be as cautious throughout this action due to the fact that you will sand the surface once more, getting rid of any flaws, hairs, or fibers from the rollers, or excess primer build-up.
The majority of bonding guides will supply you with a 7-day home window for maximum overcoat adherence. When you return, use 220+ grit sandpaper to gently open up the guide and eliminate any flaws. Don't dig also deep with the sandpaper, as you do not desire to unintentionally eliminate the bonding guide. The path to generating the finest exterior RV paint work begins and finishes with a sprayer.
Hold that trigger for too lengthy or obtain the pointer as well close to the surface area, and things go southern in a rush. If you like to utilize a roller, a three-inch, high-density foam roller is the best choice.
Painting An Rv Villa Park, CA
This is crucial to a successful surface. You must just utilize paint brushes for difficult-to-access locations and stick to the foam kind instead of the bristles. The bristles often tend to leave tiny rows behind, which looks negative when it treatments. Whatever you do, don't overdo it. Gravity antagonizes paint, similar to whatever else.
If you decide to spray paint, a lot more prep work is required, mostly in the form of painter's tape and concealing up every surface area you do not wish to paint. Area the idea approximately 8 to 12 far from the surface area and relocate rapidly with overlapping rows. The woman's rate (in the above video) is correct, yet, at times, her technique is not.
At the 2:25-minute mark, her method is off, as she's no longer preserving an equal range between the pointer and the surface of the recreational vehicle. It might appear trivial, however it produces whole rows of thin paint that sandwich rows of thick paint in between them. Primarily, make sure that there will certainly be no negative weather events, to the very best of your ability, in the 24 hr following your paint job.
Rv Paint Shop Near Me Villa Park, CA

Instead, use a fluid polishing therapy and keep a normal cleaning routine. For low-gloss or low-sheen paint jobs, do not hesitate to wax the ended up item. The most effective method to preserve the aesthetic and total charm of your outside motor home paint task is to consistently wash it. You do not have to go all wild and wash it every two or 3 days.
Certainly, attempt not to trash it or allow the youngsters anywhere near it with the bicycles, mobility scooters, or anything else. A DIY exterior motor home paint job isn't as glamorous and refreshing as it seems. The excellent news is that absolutely nothing that looks superb ever before originates from little effort. You can always get a professional to do it.
Paint Motorhome Exterior Villa Park, CA
You do not need to fret if it's waxed due to the fact that all the wax has actually to be gotten rid of in order to paint. Additionally, to paint outside fiberglass you will certainly require to sand for any kind of paint to have any opportunity of adhesion. then we get involved in what grit sand paper, lol, and thats one more topic.
Slap some paint on and allow it dry, appropriate? Sadly, even the easiest overviews for painting a recreational vehicle will certainly include a couple of more actions than that. The good news is, once you finish the following steps, you'll just make the remainder of the work that a lot easier: Also little particles might potentially obstruct of a high quality paint task.
Rv Paint And Repair Villa Park, CA
This is additionally the time to add motor home guide to make sure a constant covering. With these actions out of the way, get your vital paint equipmentwhichever you think will certainly be finest suited for the paint work you have in mindand prepare to work. From below, the job of paint your recreational vehicle is reasonably easy and straight-forward.
The simplest way to make certain that your paint looks great is to avoid these ridiculous errors:. Chemicals and abrasives will certainly do one of the most damage here. Keep in mind that you're trying to make things easy for a brand-new layer of paint, not ruin your motor home outside. Something as easy as a dead bug on your motor home exterior can truly establish in, which just makes even more benefit yourself in the future.
Enable the paint sufficient time to dry in a safeguarded area so no particles obtains in the means of the paint setting. Once completely dry, you might want to apply a safety wax finish to maintain your hard work.
Rv Painting Near Me Villa Park, CA
You don't require to stress if it's waxed because all the wax has actually to be removed in order to repaint. Also, to paint exterior fiberglass you will need to sand for any paint to have any type of chance of adhesion. then we enter into what grit sand paper, lol, and thats one more subject.
Mobile homes (Motor homes) have come a lengthy method recently, with modern-day designs and innovative functions making them a lot more comfy and hassle-free than ever before. One facet that has actually likewise seen significant development is recreational vehicle paint layouts. No longer limited to plain white outsides, motor home proprietors today have a wide range of choices to select from when it pertains to personalizing the look of their cars.
Whether you're looking to create a distinct look or simply intend to include a touch of personality to your RV, there are many ways to customize the outside of your automobile. Among the most popular patterns in recreational vehicle paint styles today is the usage of graphics and murals. These layouts vary from nature-inspired landscapes to cartoon characters and everything in between.
Paint Motorhome Exterior Villa Park, CA
This fad includes matching 2 complementary colors, such as blue and grey, to create an unified appearance that's both elegant and functional. Certainly, the fad in recreational vehicle paint designs is not restricted to just the exterior of the automobile. Numerous motor home owners are likewise choosing to personalize the insides of their cars with vibrant colors and patterns.
OCRV Center
Address: 23281 La Palma Ave Yorba Linda, CA 92887Phone: (714) 909-1444
Email: art@ocrvcenter.com
OCRV Center
In final thought, the trend in recreational vehicle paint designs is everything about revealing individuality and making a statement. Whether you favor simple and timeless, bold and attractive, or anything in between, there are many alternatives to select from when it involves tailoring the appearance of your RV. Whether you're a seasoned RV proprietor or just starting, it's never ever been easier to make your car really your own.
Rv Paint Job Villa Park, CARv Paint Shop Near Me Villa Park, CA
Class A Rv Custom Paint And Repair Villa Park, CA
Painting An Rv Villa Park, CA
Motorhome Paint Shops Villa Park, CA
Motorhome Painting Near Me Villa Park, CA
Rv Paint And Repair Villa Park, CA
Rv Paint Shops Near Me Villa Park, CA
Paint Rv Villa Park, CA
Rv Painting Near Me Villa Park, CA
Custom Rv Paint Jobs Villa Park, CA
Motorhome Painting Near Me Villa Park, CA
Painting An Rv Villa Park, CA
Paint Rv Villa Park, CA
Paint Motorhome Exterior Villa Park, CA
Motorhome Custom Paint Jobs Villa Park, CA
Rv Paint Job Villa Park, CA
Class A Rv Custom Paint And Repair Villa Park, CA
Painting Fiberglass Motorhome Villa Park, CA
Rv Painting Near Me Villa Park, CA
Class A Rv Custom Paint And Repair Villa Park, CA
Rv Paint Repair Villa Park, CA
Class A Rv Custom Paint And Repair Villa Park, CA
Rv Painting Villa Park, CA
Paint Motorhome Exterior Villa Park, CA
Rv Paint Job Villa Park, CA
Painting Fiberglass Motorhome Villa Park, CA
Paint Motorhome Exterior Villa Park, CA
Painting Rv Exterior Villa Park, CA
Painting Rv Exterior Villa Park, CA
Rv Paint And Repair Villa Park, CA
Custom Painted Motorhomes Villa Park, CA
Rv Paint And Repair Villa Park, CA
Rv Paint And Body Shops Near Me Villa Park, CA
Custom Rv Paint Jobs Villa Park, CA
Rv Paint And Body Shops Near Me Villa Park, CA
Painting Rv Villa Park, CA
Painting Rv Exterior Villa Park, CA
Painting Rv Villa Park, CA
Motorhome Painting Near Me Villa Park, CA
Motorhome Custom Paint Villa Park, CA
Paint Motorhome Exterior Villa Park, CA
Class A Rv Custom Paint And Repair Villa Park, CA
Rv Paint And Repair Villa Park, CA
Class A Rv Custom Paint And Repair Villa Park, CA
Painting Rv Villa Park, CA
Motorhome Painting Villa Park, CA
Rv Paint Shops Near Me Villa Park, CA
Motorhome Paint Shops Villa Park, CA
Paint Rv Villa Park, CA
Custom Motorhome Paint Jobs Villa Park, CA
Rv Paint Villa Park, CA
Rv Paint And Body Shops Near Me Villa Park, CA
Rv Exterior Paint Villa Park, CA
Painting Rv Walls Villa Park, CA
Rv Painter Villa Park, CA
Paint Rv Villa Park, CA
Custom Motorhome Paint Jobs Villa Park, CA
Painting Rv Walls Villa Park, CA
Class A Rv Custom Paint And Repair Villa Park, CA
Rv Painting Villa Park, CA
Class A Rv Custom Paint And Repair Villa Park, CA
Motorhome Painting Near Me Villa Park, CA
Rv Paint And Repair Villa Park, CA
Painting An Rv Villa Park, CA
Rv Painting Near Me Villa Park, CA
Rv Painting Near Me Villa Park, CA
Rv Paint Job Villa Park, CA
Custom Painted Motorhomes Villa Park, CA
Paint Fiberglass Rv Villa Park, CA
Rv Paint Villa Park, CA
Motorhome Painting Villa Park, CA
Custom Rv Paint Jobs Villa Park, CA
Motorhome Custom Paint Villa Park, CA
Painting Fiberglass Motorhome Villa Park, CA
Motorhome Paint Shops Villa Park, CA
Painting An Rv Villa Park, CA
Rv Paint Shop Near Me Villa Park, CA
In My Area Seo Companies Near Me Villa Park, CA
Around Me Seo Agency Villa Park, CA
OCRV Center
Table of Contents
- – Rv Paint Shop Near Me Villa Park, CA
- – OCRV Center
- – Paint Motorhome Exterior Villa Park, CA
- – Rv Painting Near Me Villa Park, CA
- – Rv Painting Near Me Villa Park, CA
- – Painting Rv Exterior Villa Park, CA
- – Painting An Rv Villa Park, CA
- – Motorhome Custom Paint Villa Park, CA
- – Painting An Rv Villa Park, CA
- – Rv Paint Shop Near Me Villa Park, CA
- – Paint Motorhome Exterior Villa Park, CA
- – Rv Paint And Repair Villa Park, CA
- – Rv Painting Near Me Villa Park, CA
- – Paint Motorhome Exterior Villa Park, CA
- – OCRV Center
Latest Posts
Laguna Niguel Best Supplemental Insurance For Seniors
Lake Forest Vision Insurance For Seniors Over 65
Cheapest Insurance For Seniors Lake Forest
More
Latest Posts
Laguna Niguel Best Supplemental Insurance For Seniors
Lake Forest Vision Insurance For Seniors Over 65
Cheapest Insurance For Seniors Lake Forest